The host maintainer (Dreamhost) decided to quit support for python through Passenger... YEAH!!!
This, of course, led to a stop in the uploading of images from the skycam and the need for a major restructuring of the entire architecture. At the moment, the site is being redesigned by moving the backend from python/Flask to PHP.
The web interface has a makeover for the live and repository pages.
There are still a few things to fix but they are now more usable on mobile devices. The texts are more readable and the repository allows you to see additional timelapse information (such as the skymap and shooting information). The repository menu still lacks a better look and search and a routine for creating previews of past days.
The project is now on Facebook (https://www.facebook.com/SkyUpAstronomy/)!!!
The auto-generated contents will be posted automatically as video and images as soon as they are ready.
Today is THE DAY!!!
After field testing and appropriate insulation and encapsulation, the project is ready to present itself to everyone. As of today, it starts recording and showing you the sky without filters and without limits!
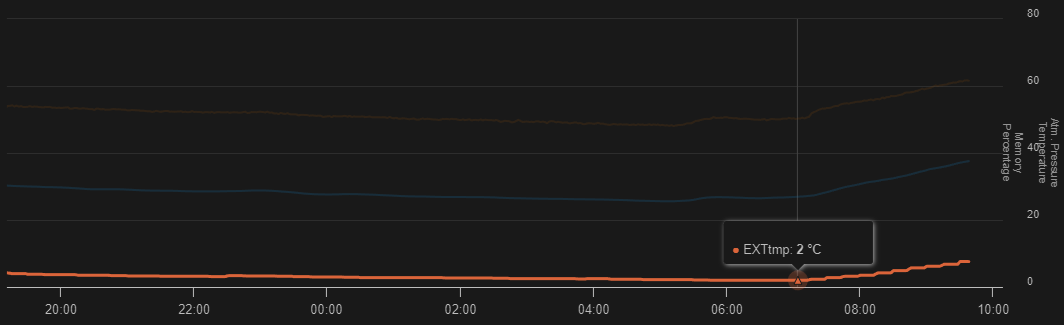
The climate gave me a couple of cloud-free days and, fortunately, a new moon.
I therefore had the opportunity to test how the box behaves in winter conditions. The night averaged 2°C outside. The box, internally, maintains a temperature of around 26.5°C mainly due to the temperature of the Rpi CPU which is kept around 49.5°C. CPU works at 16% on average, confirming that the load has totally shifted to the server side.
So I was able to test the timelapse creation function (the first ever). Creation time is approximately 6 minutes for video with 3600 frames (20fps) weighing about 110Mb.
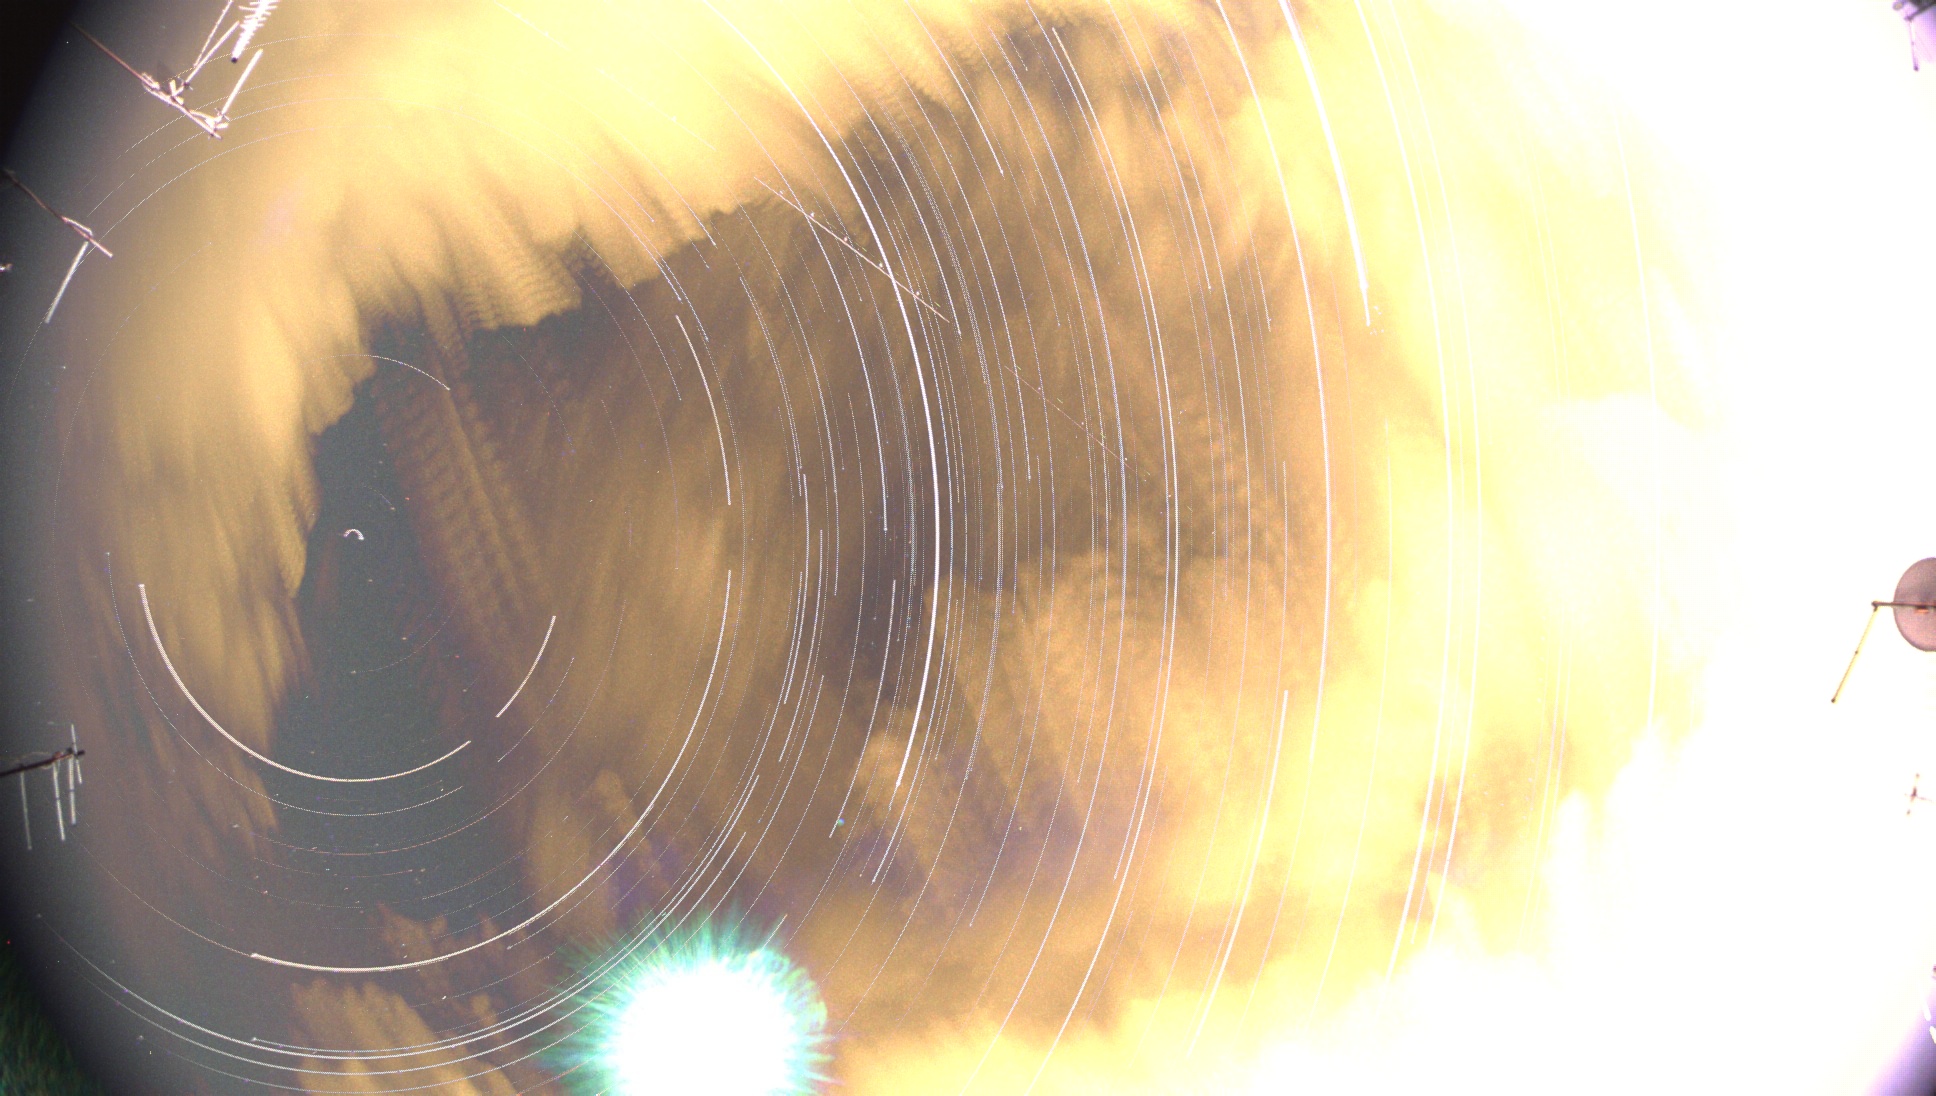
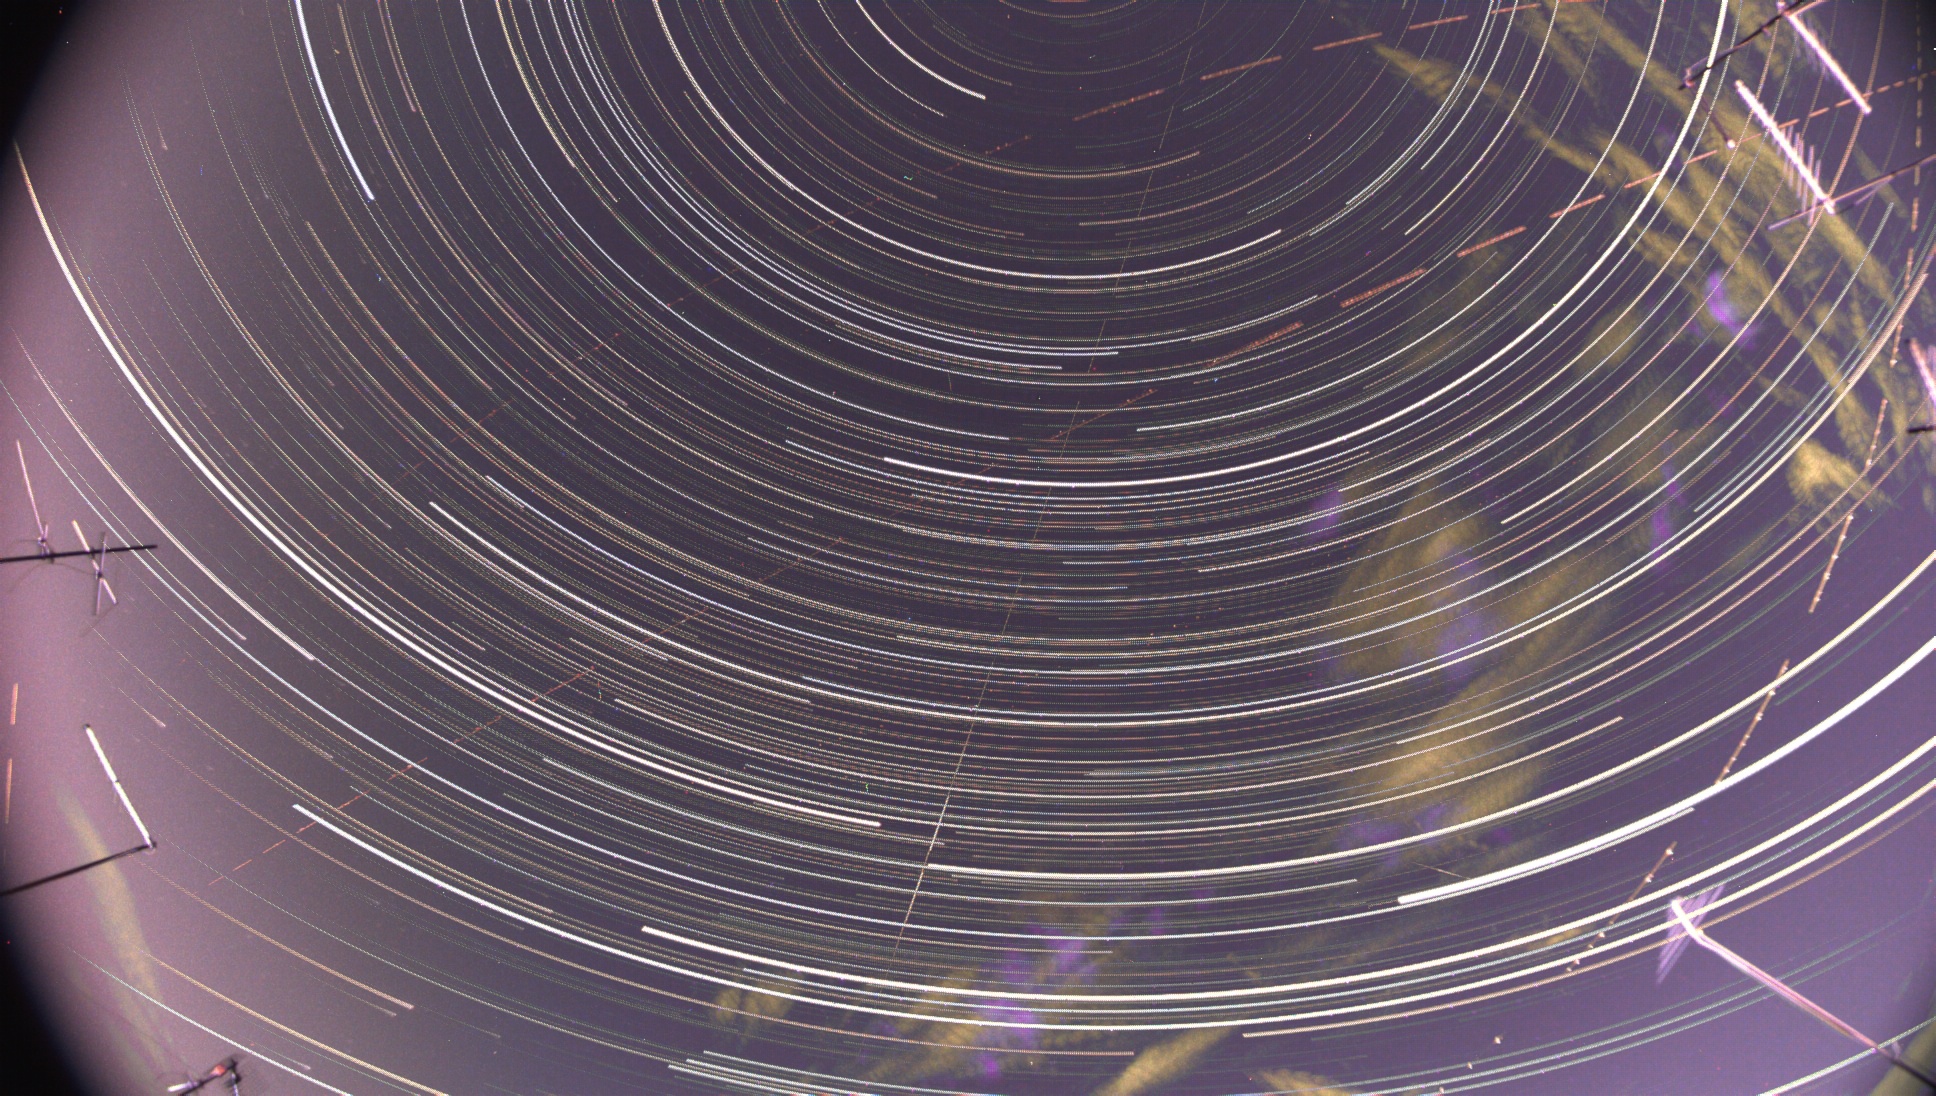
And the corresponding startrails created in about 22 minutes weighing approximately 1Mb.
The first idea is. Make the Raspberry-Pi side as simple as possible. The site on which you read these brief notes takes care of most of the processing (astronomical calculations, image and video processing, presentation and synchronisation).
The website is an integral part of the project and is fully customised. I personally took care of the graphics, the infrastructure (back/front-end) and the integration rules with the data from the all-sky camera. It is in continuous development and, like all things born out of 'passion', is full of compromises and work-in-progress. But in its own way it grinds out data and delivers results. You will see it updating and hopefully improving!
In the near future, I will add implementation details on this section and, if they come, some pictures and results.
The hardware is basically simple:
- Computing module: Raspberry Pi 4 ModB 4GB
- Camera: ZWO ASI290MC (planetary camera)
- Lens: ZWO 1/3″ 2.1mm
- Sensors: i2c board with AHT20 (temperature, humidity) + BMP280 (temperature, pressure)
- Power supply: dc-dc step down 3A
- PoE splitter: 48V to 12V 802.3af 10/100Mbps active PoE splitter
- PoE injector: Gigabit PoE+ Injector, 90W 802.3af/at/bt 1000 Mbps 100mt
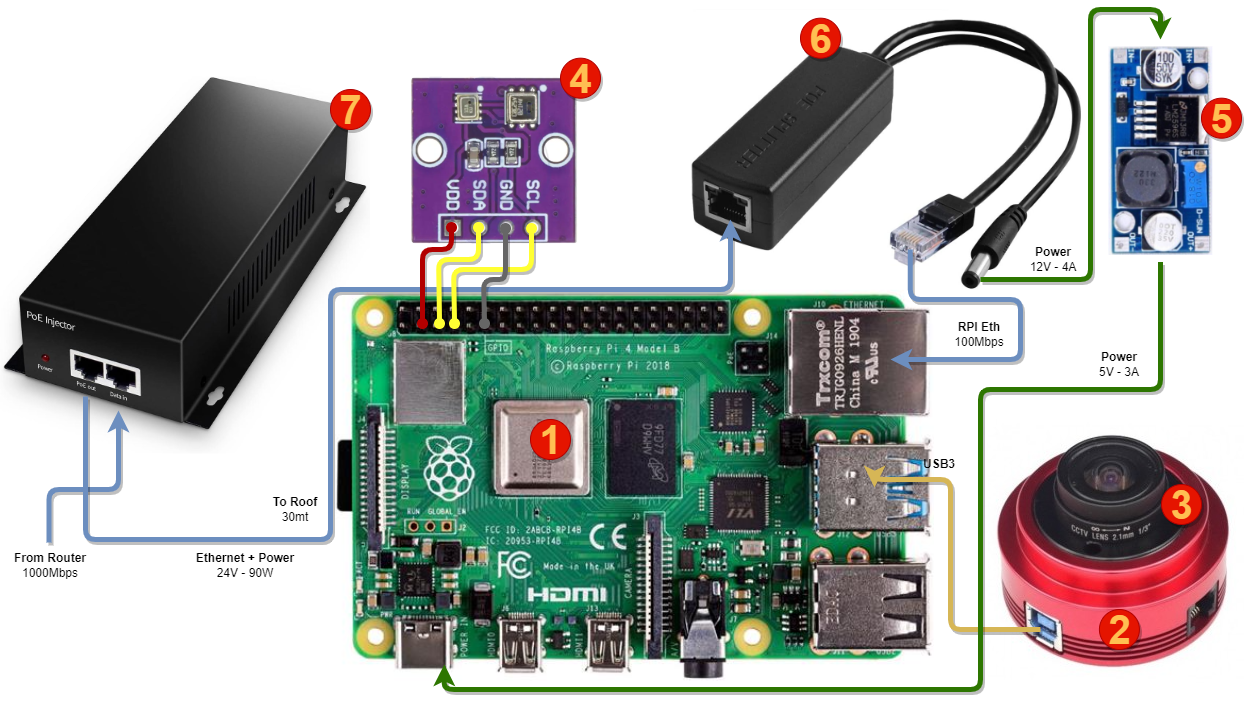
The camera is connected via USB3 to speed up image download, while the sensors are connected via i2c procotol directly to the RaspberryPi's GPIO header.
PoE allows the box to be powered and connected up to 100m away. For the patio, 30m is fine. The wall power supply provides 24V in Active PoE mode, so an active 24V-12V adapter is required to take the output from the remote PoE port. An alternative would have been to use Passive PoE, where no passive device is required. However, this would have limited power and distance and required a dedicated power supply. Passive PoE, on the other hand, would have been simpler.
Finally, to provide sufficient power for the RaspberryPi, it is necessary to boost the 12V to 5V with an adjustable step-down. In this case the maximum output is limited to 3A by the DC-DC converter. More expensive alternatives allow more current (up to 90W). For our purposes 3A is more than enough.
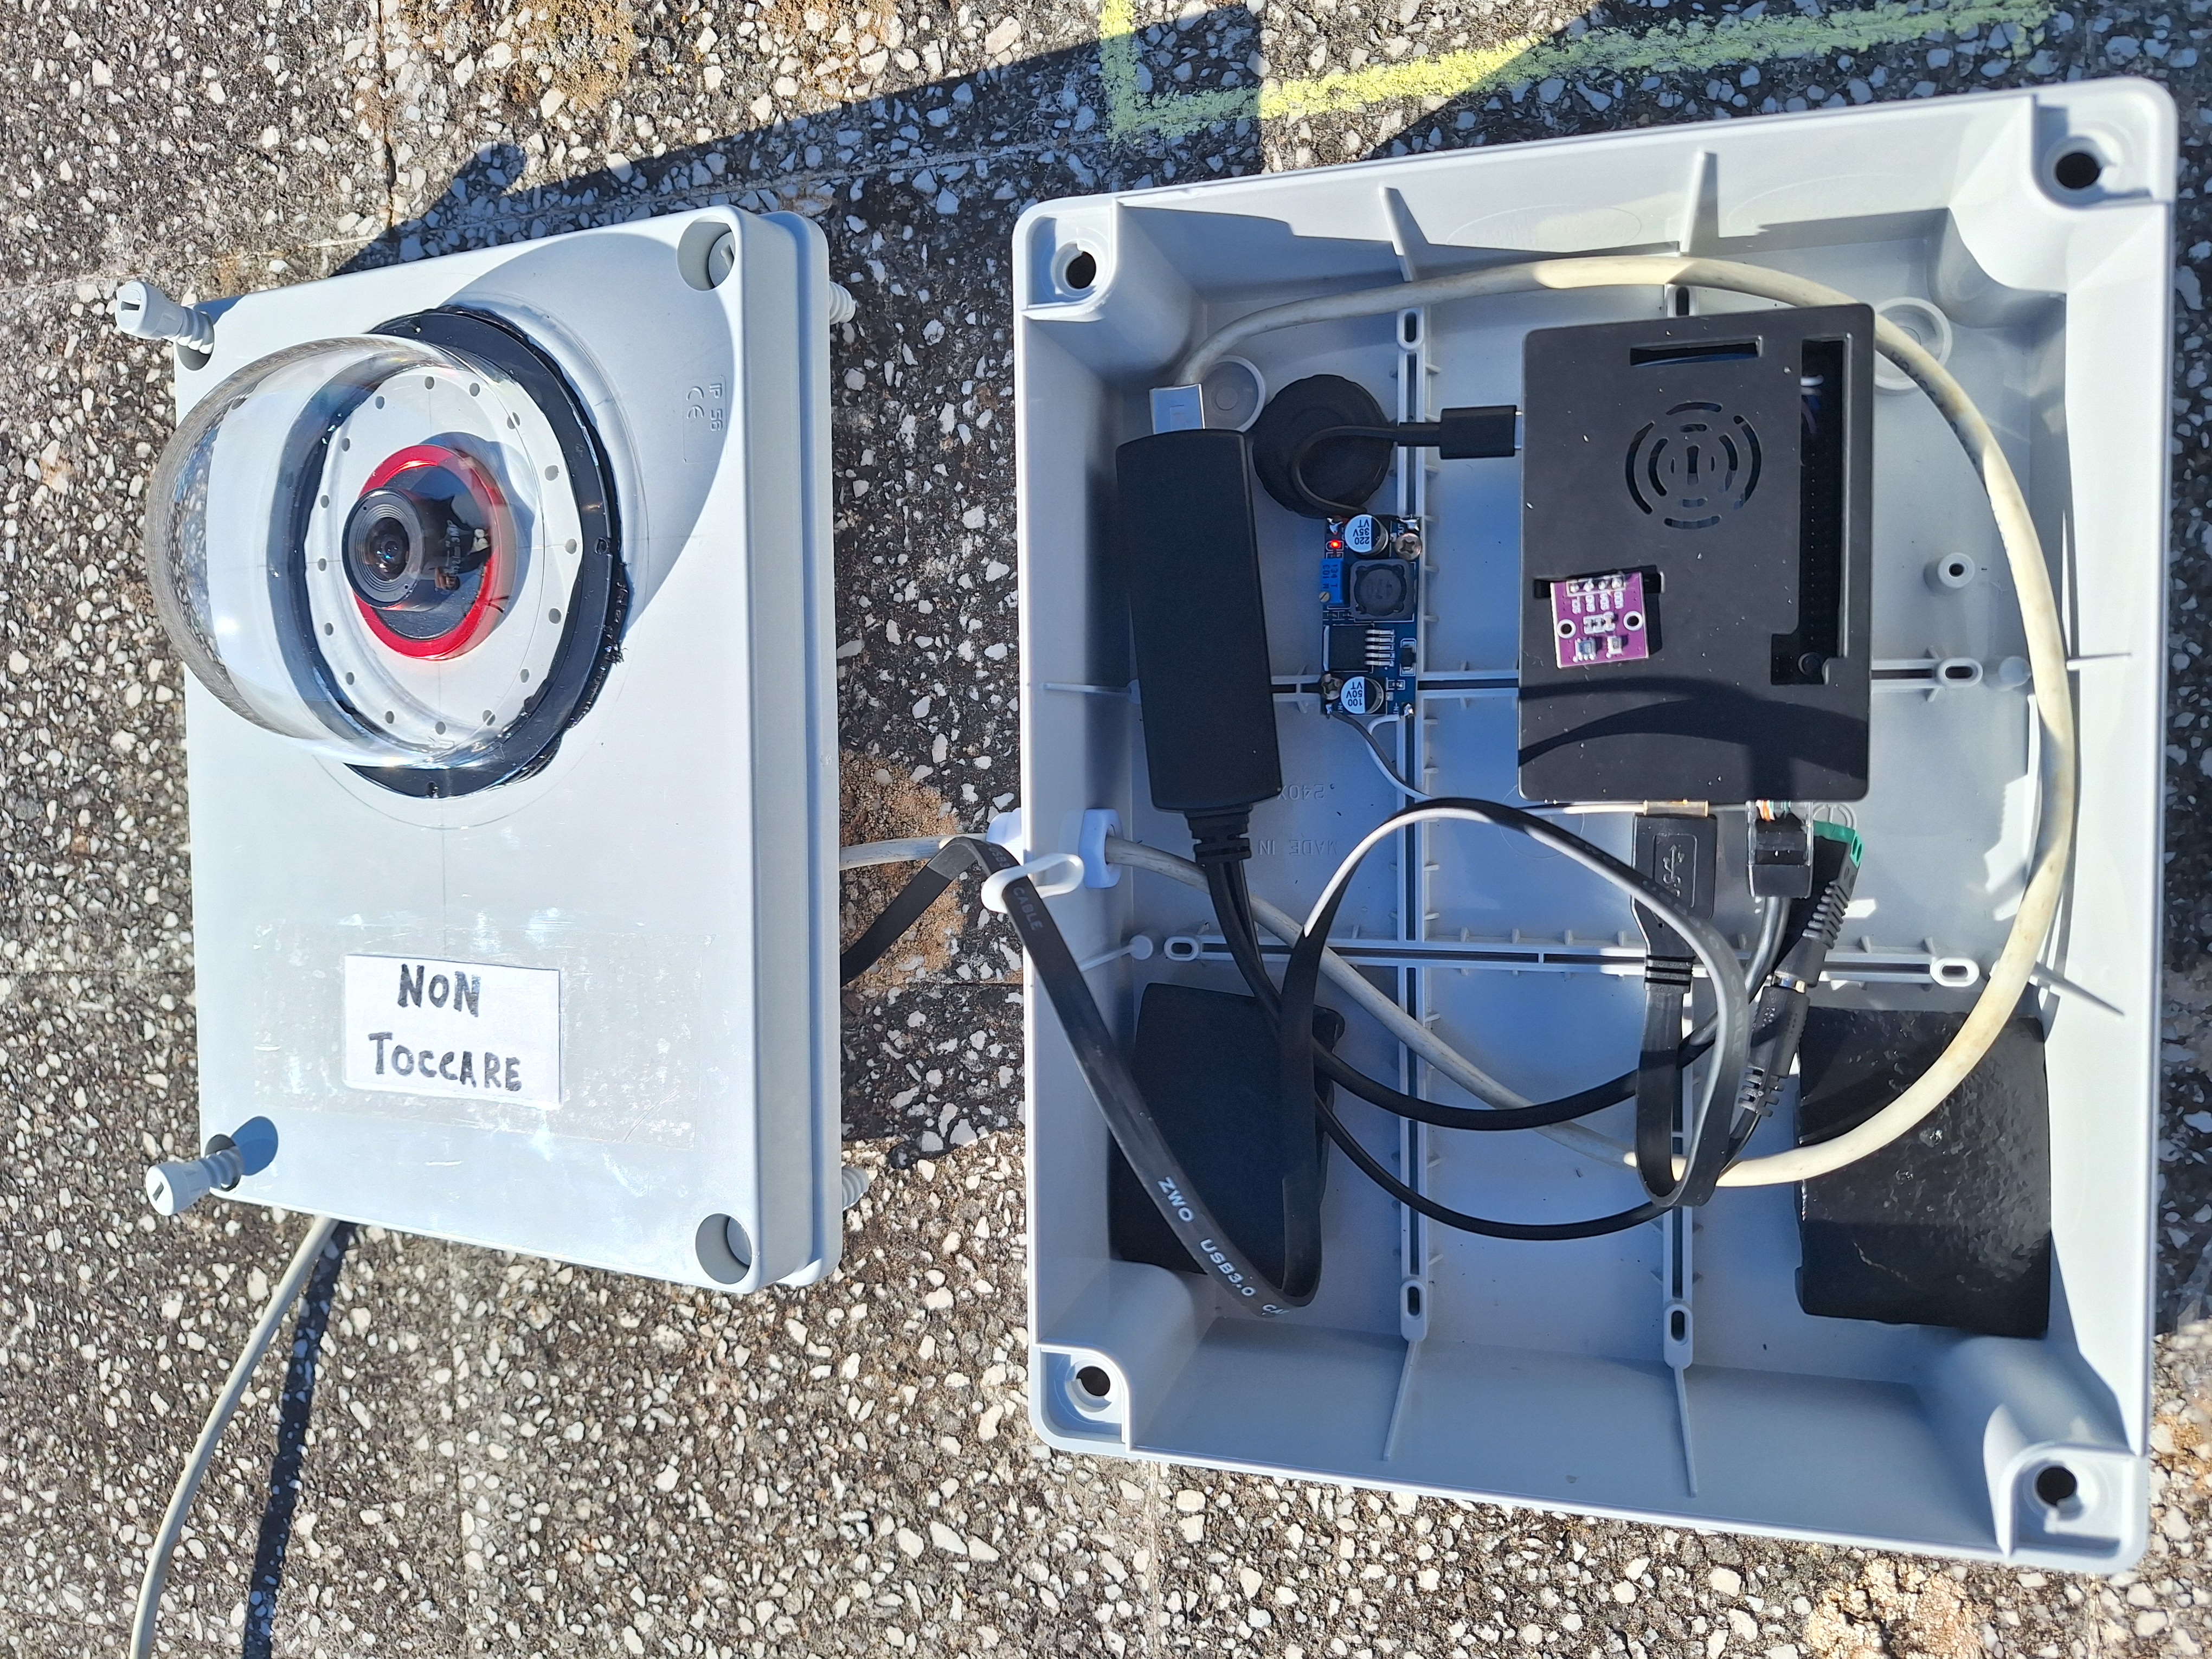
Let's talk about the box... I used a simple outdoor electrician's box (IP56) with a 5mm grommet to insulate the power cable entry. A hole was drilled into the box to accommodate the ASI 290 MC camera and an outdoor dome for CCTV cameras was fitted.
Sealed with UV resistant silicone. Note the holes near the camera, under the dome. The purpose of these holes is to allow the heat generated by the DC-DC step-donw and the RaspoberryPi's CPU to reach the sub-dome, and hopefully help reduce moisture build-up on the sub-dome.
Two 500g cast iron weights + a 1kg silica gel bag were also placed inside the box. Together with a good seal on the box and internal heat, there should be no moisture problems. We will see how it behaves under more extreme conditions (at the moment it has not rained, the humidity outside is about 40° and the humidity measured inside is 0%!!!).
Taking advantage of a few extra days off from work , I gave room to an innate desire of mine. I wanted to build a totally autonomous system that would record the sky. So begins the adventure of this SkyUp project.
The very basic hardware is a planetary camera, a RaspberrPy 4 (8GB) and a set of environmental sensors (for humidity, temperature and pressure).
The software was the most complex part. I started by looking around... and I could only come across a wonderful OpenSource project by Thomas Jacquin (https://github.com/AllskyTeam/allsky). I wanted, however, to go a little further by configuring and customising every aspect of the software.